

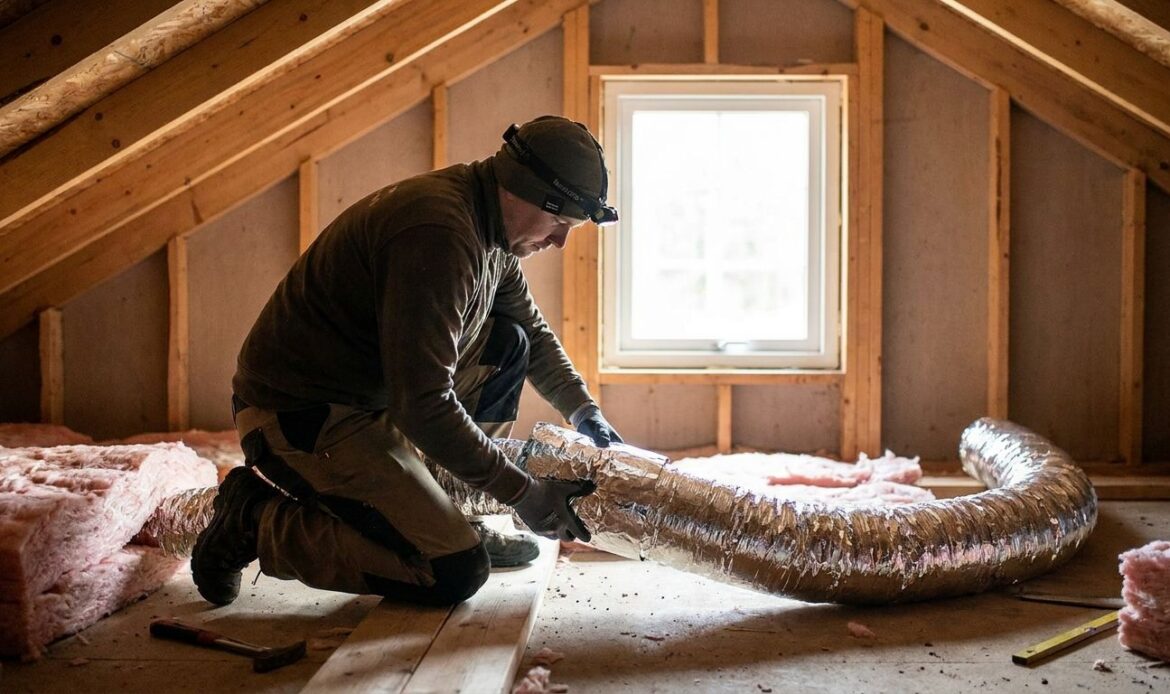
Uninsulated or leaky attic ductwork wastes conditioned air before it reaches a single room, and in a Bay Area attic that can hit 130°F or more in July, the loss compounds fast. This guide walks through insulating and sealing attic ductwork step by step, with the specific materials, R-values, and mistakes that matter for Sonoma, Marin, Napa, Solano, and Contra Costa homes in 2026.
- Bay Area attics call for R-8 duct insulation minimum under California’s Title 24 energy code as of 2026.
- Sealing duct joints with mastic before insulating cuts the 20-30% air loss typical of leaky duct systems.
- Foil-faced fiberglass duct wrap is the standard fix for exposed attic runs; rigid duct board suits new installs.
- A licensed contractor should handle any duct segment near a furnace plenum or air handler connection.
- Re-insulating pays back through lower summer AC runtime, not a one-time fix that ends there.
Why this matters
Most homes built before the 2000s in Sonoma, Marin, and Napa counties have ductwork sitting exposed in the attic with thin, sagging insulation or none at all. That ductwork sits in the hottest, most extreme part of the house on both ends of the season — baking in summer, near-freezing on cold winter mornings.
The Department of Energy and Energy Star both cite that a typical forced-air duct system loses 20% to 30% of the air moving through it to leaks, gaps, and poor connections, and attic ducts carry most of that loss because they're the longest exposed run in the house. Add cracked or compressed insulation and the AC or furnace runs longer to hit the same setpoint, which shows up directly on the utility bill every summer and winter of ownership.
This isn't cosmetic work. It's the difference between a system that's sized correctly on paper and one that actually delivers that capacity to the living space.
What you'll need
- Foil-faced fiberglass duct wrap, R-8 rated (minimum required for exposed attic ducts under California's Title 24 energy code in 2026)
- UL 181-rated mastic sealant and a paintbrush or mastic brush
- Foil tape (not standard cloth duct tape — it degrades in attic heat within a season)
- Utility knife, tape measure, wire ties or duct strapping
- Attic-rated headlamp, knee pads, N95 mask (attic insulation dust and rodent debris are common in older Bay Area homes)
- 3-4 hours for a typical single-story attic with 40-60 linear feet of exposed duct
- A helper for runs longer than 15 feet — wrapping duct solo gets unwieldy fast
If any duct segment connects directly to the furnace plenum, air handler, or has visible mold or rodent damage, that's a job for a licensed technician, not a DIY afternoon. How to choose an HVAC contractor in the Bay Area covers what to check before hiring one.
The steps
1. Inspect every duct joint before touching insulation
Crawl the full attic duct run with a flashlight and look at every connection point, elbow, and boot. You're checking for gaps, torn foil, disconnected sections, and old cloth duct tape that's peeling — all of it needs to be addressed before insulation goes on top, because wrapping a leak just hides it instead of fixing it.
Mark problem spots with painter's tape as you go so you're not hunting for them twice. Expect to find at least a few loose connections in any attic system older than 15 years.
Common mistake: skipping this step and wrapping over an active leak. That trapped air erodes insulation from the inside and the leak keeps costing you money invisibly.
2. Seal every joint and seam with mastic
Apply UL 181-rated mastic sealant with a brush to every joint, seam, and connection point you marked. Mastic dries into a flexible, permanent seal that doesn't crack or peel the way tape does under attic temperature swings.
Work it into gaps wider than 1/4 inch with mesh tape underneath first, then coat over the top. Let it cure for the time listed on the product label — usually 24 hours — before moving to insulation.
Common mistake: using standard cloth duct tape instead of mastic or foil tape. Cloth tape fails within one Bay Area summer once attic heat breaks down the adhesive.
3. Measure and cut duct wrap to size
Measure the circumference of each duct section plus 2 inches for overlap, and cut foil-faced fiberglass wrap to length using a utility knife on a flat surface. Cutting cleanly matters — ragged edges leave gaps once wrapped.
For round duct, cut wrap long enough to overlap itself by at least 2 inches when wrapped around. For rectangular trunk lines, measure each side separately.
Common mistake: cutting wrap too tight to save material. Compressed insulation loses most of its R-value, so slightly generous cuts perform better than exact ones.
4. Wrap with the vapor barrier facing out
Wrap the insulation around the duct with the foil-faced vapor barrier on the outside, insulation touching the metal duct surface, and secure every 12-18 inches with wire ties or duct strapping. The foil facing has to face out — reversed installation traps moisture inside the insulation and leads to mold within a season.
Overlap seams by 2 inches minimum and seal every seam with matching foil tape, not the wrap's own adhesive strip alone. Compress joints at elbows carefully so the insulation doesn't gap on the outside of the bend.
Expected outcome: a fully wrapped duct run with no visible metal, no gaps at joints, and seams sealed flat against the duct surface.
5. Insulate and seal all boots and register connections
The boot — where duct meets the register in the ceiling below — is the single most commonly skipped spot in DIY attic insulation jobs. Wrap and seal it the same as any other joint, since it's directly exposed to attic air on one side and conditioned space on the other.
Use mastic around the boot-to-duct connection first, then wrap with the same R-8 material, leaving clearance for the register box itself.
Common mistake: leaving boots bare because they're awkward to reach. That single gap can undo a large share of the efficiency gain from wrapping the rest of the run.
6. Check clearance around recessed lighting and flues
Before closing anything up, confirm insulation doesn't touch non-IC-rated recessed light housings or any gas flue pipe — both are fire code issues, not just performance ones. Keep a minimum 3-inch clearance from flues per manufacturer specs printed on the wrap packaging.
This step gets skipped when people rush the last stretch of a long attic crawl. Don't.
7. Walk the full run one more time
Crawl the attic a second time after everything's wrapped and sealed, checking for compressed sections, exposed metal, and any seam that opened during the strapping process. This final pass catches the mistakes that happen from working in a hot, cramped space at hour three.
Expected outcome: every visible duct surface covered, seams flat and taped, boots wrapped, and no insulation touching lights or flues.
Troubleshooting
Duct wrap keeps sliding off round ducts. Strapping intervals are probably too wide — tighten to every 12 inches instead of 18, especially on horizontal runs.
Mastic won't stick to an old duct surface. Dust and old tape residue block adhesion. Wipe the surface with a rag before applying; mastic needs a clean metal surface to bond.
Insulation is damp when you check it a few weeks later. The vapor barrier is likely facing inward instead of outward, or there's an active leak nearby introducing humid attic air into the wrap. Re-check facing direction first.
AC still runs long after insulating. Insulation fixes conduction and radiant loss, but it doesn't fix undersized ductwork or a system that's already too small for the square footage. That's a sizing question, not an insulation one — see how to choose the right AC size for a Bay Area home.
Rodent damage found mid-project. Stop and address the rodent issue and any chewed wiring or insulation before continuing. Attic rodent activity is common enough in older Sonoma and Marin county homes that it's worth a separate inspection.
System is over 15 years old and still underperforming after the fix. Insulation buys efficiency, but an aging system has other losses insulation can't touch. How to know when to replace your HVAC system breaks down the signs worth checking.
Not sure the ductwork is DIY-safe?
A quick inspection settles it before you’re elbow-deep in insulation.
Tools and resources
- UL 181-rated mastic and foil tape, sold at HVAC supply houses (not general hardware store duct tape)
- R-8 foil-faced fiberglass duct wrap, sized to your duct diameter
- A yearly maintenance check catches insulation degradation before it becomes a bigger repair — HVAC maintenance plans for Bay Area homeowners covers what a seasonal check typically includes
- A licensed technician for any plenum, air handler, or flue-adjacent work
What to do next
Insulating ductwork is one piece of getting an attic system ready for Bay Area weather swings. Wildfire season adds smoke infiltration and extreme heat load on top of normal summer demand, and attic ductwork sits at the center of both. How to prepare your HVAC for Sonoma County wildfire season covers the filtration and sealing checks that pair naturally with the work above.
FAQ
What R-value do attic ducts need in California?
California’s Title 24 energy code requires a minimum of R-8 insulation for ductwork in unconditioned attics as of 2026. Ducts inside conditioned space need less, typically R-6, since they’re not exposed to extreme attic temperatures.
Is it worth insulating ductwork myself?
Basic wrapping of exposed, accessible duct runs is a reasonable DIY project with the right materials and 3-4 hours. Any work near the furnace plenum, air handler, or with existing mold or rodent damage should go to a licensed HVAC technician instead.
How much air do leaky ducts actually waste?
A typical forced-air duct system loses 20% to 30% of the air moving through it to leaks and poor connections, according to Energy Star. Sealing joints with mastic before insulating addresses the bulk of that loss.
Can I use regular duct tape to seal attic ductwork?
No — standard cloth duct tape degrades and peels within one Bay Area summer once attic heat breaks down its adhesive. UL 181-rated mastic sealant or foil tape holds up under repeated heat cycling instead.
How hot does a Bay Area attic actually get?
Unshaded attics in Sonoma, Napa, and Contra Costa counties commonly hit 130°F or higher on summer afternoons. Uninsulated ductwork sitting in that heat picks up thermal load before conditioned air ever reaches a room.
Does insulating ductwork lower my energy bill?
Yes — reducing conduction and radiant heat gain on attic ducts means the AC or furnace runs less to hit the same setpoint. The exact savings depend on how leaky and under-insulated the system was to start.
How often should attic duct insulation be checked?
Check it during any annual HVAC maintenance visit, since compressed, torn, or displaced insulation is common after attic storage projects or pest activity. A seasonal inspection catches degradation before it turns into a bigger repair.
One last thing
The boot connections at each register are the spot almost every DIY attic insulation job misses, and they're often responsible for more heat gain than the long straight runs people spend hours carefully wrapping. Spend the extra 20 minutes there before calling the job done.
Related guides