

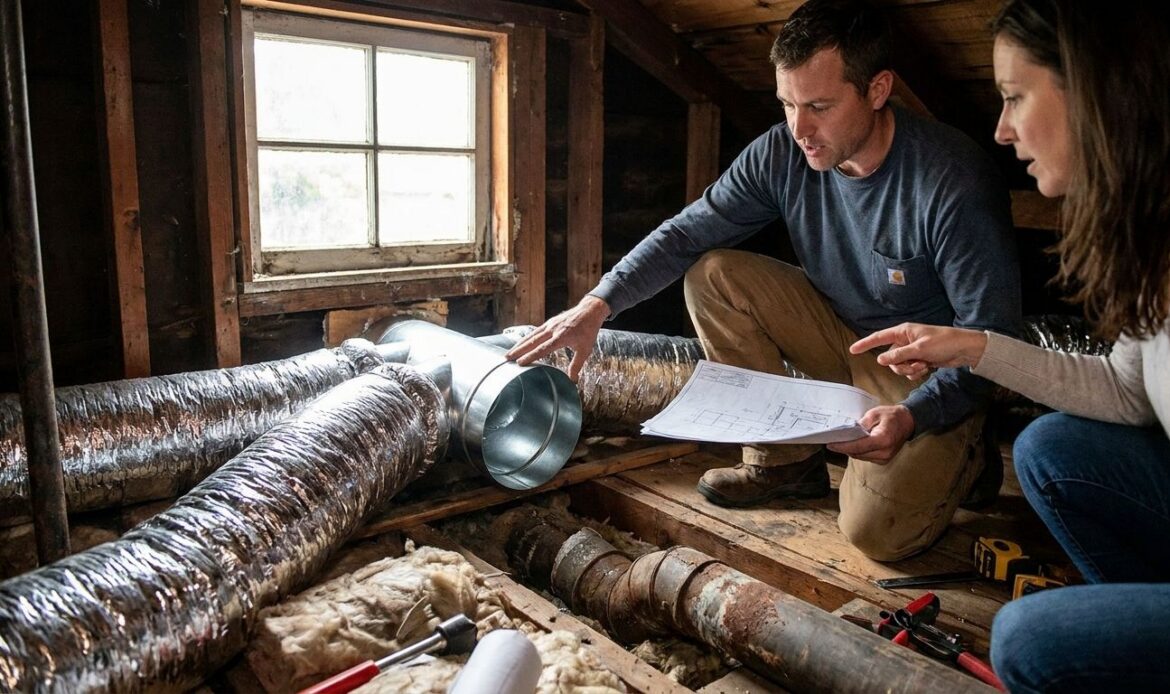
Older Bay Area homes — the 1920s Craftsmans in Sonoma, the split-levels from the 1960s in Contra Costa County, the ranch houses scattered across Solano — almost never have ductwork sized for the loads modern HVAC equipment actually needs. Redesigning that ductwork is the single biggest lever on comfort, noise, and utility bills in a retrofit project.
- Redesigning ductwork in an older Bay Area home starts with a room-by-room load calculation, not a guess based on the old layout.
- Sealing every joint before insulating cuts the 20-30% air loss typical of aging duct systems — verdict: non-negotiable step.
- Ducts routed through unconditioned attics need R-8 insulation minimum to hold performance through Bay Area summers and winters.
- Homes with no usable duct chase are often better candidates for a heat pump for homes without existing ductwork than a full duct rebuild.
- Comfort Factor recommends a final static pressure test before calling any duct redesign complete in 2026.
Why this matters
A lot of older Bay Area homes were built with duct systems sized for a furnace that no longer exists, or for a house before a room addition doubled the square footage. Air handlers get swapped over the decades but the ducts almost never do, which is why one bedroom runs hot, another runs cold, and the whole system short-cycles.
Duct sealing alone recovers a meaningful chunk of lost capacity, and it's the cheapest fix on this list before anything gets rerouted. If the ductwork itself is undersized, crushed in a crawlspace, or missing entirely in an addition, sealing won't fix the underlying design problem — that's when a redesign earns its cost.
What you'll need
- A current floor plan or rough sketch of every room the system serves
- A manometer or static pressure gauge (a contractor brings this — most homeowners don't own one)
- Access to the attic, crawlspace, and any closets hiding duct chases
- Mastic sealant and metal tape (skip foil-backed tape alone — it fails within a few years)
- Rigid or flexible duct sized per a Manual D load calculation, not the old duct diameters
- A block of time: a full duct redesign on a 1,800-2,200 sq ft home typically runs 2-4 working days
- A decision point on whether every room needs ducted air, or whether a heat pump for homes without existing ductwork makes more sense for an addition or a room the old ducts never reached
The steps
1. Map the existing layout and flag the failure points
Walk every register with the system running and note which rooms get weak airflow, which ducts are crushed or disconnected, and where runs are longer than they need to be. In older Sonoma and Marin County homes, it's common to find ducts that snake through three rooms to reach a fourth because the original layout was never updated when walls moved.
Common mistake: relying on memory instead of physically opening the attic or crawlspace access. Ducts get crushed by stored boxes, chewed by rodents, or disconnected during a past remodel — you won't know until you look.
2. Measure static pressure and airflow at each register
Static pressure readings tell you whether the system is fighting itself — too high, and the blower works harder for less air; too low, and rooms far from the air handler starve. A healthy residential system usually runs under 0.5 inches of water column total external static pressure.
This step is why a professional gauge matters more than eyeballing airflow with your hand. Expected outcome: a clear list of which runs need resizing versus which just need sealing.
3. Decide which rooms get ducted air and which don't
Not every room in an older home needs to stay on the ducted system. A converted attic bedroom or a detached office over a garage is often cheaper and more comfortable served by a dedicated zone than by extending a duct run 40 feet from the main trunk.
This is the decision point where a full redesign and a hybrid approach split. Expected outcome: a room-by-room map marking ducted vs. non-ducted zones.
4. Size new runs to a load calculation, not the old ducts
Pull a Manual J load calculation for the house, then size trunk and branch ducts to a Manual D layout. Copying the diameters of the old ducts just repeats whatever undersizing or oversizing caused the comfort complaints in the first place.
Common mistake: upsizing every duct "to be safe." Oversized ducts move air too slowly, which drops velocity and lets dust settle inside the run.
5. Seal every joint before anything gets insulated
Mastic sealant on every seam, boot, and register connection, applied before insulation goes over the duct. Skipping this step is the single biggest reason duct redesigns underperform — a beautifully resized duct still leaks 15-20% of its air if the joints aren't sealed. Comfort Factor treats duct sealing as a mandatory line item on every redesign, not an upsell.
Expected outcome: a pressure test showing leakage well under the 20-30% baseline typical of untouched older systems.
6. Insulate runs through attics and crawlspaces
Any duct routed through an unconditioned space needs insulation rated at least R-8 to hold its temperature through a Bay Area summer attic, which can hit 130-140°F under the roof deck. Homes in Napa and Solano County with long attic runs lose the most here if this step gets skipped.
Contractors who insulate ductwork in a Bay Area attic as a standard part of the redesign — not a separate quote — tend to deliver more consistent room-to-room temperatures.
7. Balance the system and retest static pressure
Adjust dampers at each branch until airflow at the registers matches the load calculation from step 4, then rerun the static pressure test from step 2. Expected outcome: static pressure back under 0.5 inches WC and airflow within 10% of target at every register.
Common mistake: balancing by feel with a hand instead of an anemometer or flow hood. Airflow that "feels fine" can still be 30% off target.
8. Schedule a final inspection before closing up walls or attic access
Once ducts are sealed, insulated, and balanced, get a final look before insulation batts or drywall cover the work. Photograph every run for future reference — in a house this old, the next contractor who touches the system in ten years will thank you.
Troubleshooting
- One room is still cold after the redesign. Check the damper at that branch first — it's the cheapest fix and the most common oversight during balancing.
- New ducts rattle or whistle. Usually an undersized register opening relative to the duct diameter, or a loose connection at a boot. Reseal the joint and confirm the register is rated for the airflow passing through it.
- Dust increased after the work. Flex duct interiors can shed lint when first installed, or the redesign disturbed years of settled dust in the trunk line. A duct cleaning pass after the redesign settles this within a few weeks.
- Utility bills went up, not down. Check that the new ducts are actually sealed at every joint — a redesign that resizes runs but skips mastic can leak more air than the old system did, just faster.
- A duct run doesn't fit the joist bay in a 1940s or 1950s home. Older framing often has shallower joist bays than modern duct diameters assume. Flex duct or a flattened rectangular run solves this more often than tearing into framing.
Tools and resources
- Manometer or static pressure gauge for before/after testing
- Mastic sealant, metal tape, and R-8 duct insulation
- A load calculation (Manual J) and duct layout (Manual D) from a licensed contractor
- Reference guide: duct sealing for Bay Area homes for what proper sealing looks like
- Reference guide: insulate ductwork in a Bay Area attic for attic-specific insulation values
Get a duct redesign quote
Comfort Factor maps, seals, and resizes older Bay Area duct systems.
What to do next
If the house has zero usable duct chase — common in older Marin County cottages with no attic access above certain rooms — stop planning a duct redesign and look at whether ductless makes more sense for that zone. Before hiring anyone for the work, read how to choose an HVAC contractor in the Bay Area so the redesign quote you get in 2026 actually includes a load calculation and not just a rough estimate.
FAQ
How much does it cost to redesign ductwork in an older home?
Cost depends on how many runs need resizing and how much attic or crawlspace access the crew has, and pricing varies by contractor in 2026. Get a quote that itemizes sealing, insulation, and resizing separately so you can see where the money goes.
Is it better to redesign ductwork or replace it entirely?
Redesign the layout and reseal what’s structurally sound; replace only the runs that are crushed, disconnected, or undersized for the load calculation. Full replacement makes sense when more than half the system needs work anyway.
How long does a whole-house duct redesign take?
A typical 1,800-2,200 sq ft home takes 2-4 working days for mapping, resizing, sealing, and balancing. Homes with tight crawlspace access or extensive rerouting can run longer.
Do I need to redesign ductwork before installing a heat pump?
If the existing ducts are undersized or leaking heavily, yes — a new heat pump moves air differently than an old furnace and performs worse on a duct system that wasn’t sized for it. Homes with no usable ductwork often skip the redesign entirely and go ductless instead.
Can I seal and insulate ducts myself without a full redesign?
Sealing accessible joints with mastic and adding insulation in the attic is a reasonable DIY step, but resizing undersized trunk lines requires a load calculation most homeowners don’t have the tools to run. Do the sealing yourself, then get a professional opinion on whether resizing is actually needed.
What’s the difference between duct sealing and duct redesign?
Duct sealing fixes air leaks at joints and connections on the existing layout. Duct redesign changes the size, routing, or number of runs based on a new load calculation, which sealing alone can’t fix if the ducts were wrong to begin with.
How do I know if my old ducts are undersized?
Uneven room temperatures, a system that runs constantly without reaching the thermostat setpoint, and static pressure readings above 0.5 inches WC all point to undersized or poorly laid out ductwork. A static pressure test during an inspection confirms it.
One last thing
The part homeowners skip most often isn't the resizing — it's the final static pressure retest after balancing. Skipping it means finding out six months later, in the middle of a Bay Area heat wave, that one branch was never actually rebalanced.
Related guides
- Duct sealing for Bay Area homes
- How to insulate ductwork in a Bay Area attic
- Duct cleaning for Bay Area homes
- Heat pump for homes without existing ductwork in the Bay Area
- How to choose an HVAC contractor in the Bay Area